Cowboy Hat Drawing: Wide-brimmed headgear with a cowboy hat is a common sight on cowboys and other ranch employees. In the United States, cowboy hats are constructed from a range of materials, including straw, felt, and leather.
An extremely practical piece of apparel, the cowboy hat shields the user from the sun, wind, and rain. It also provides a carrying capacity for supplies and serves as protection against the cold.
The history of the cowboy hat dates back to the 19th century. It is said that they were first used by cowboys in the American West to protect themselves from the weather.
Even today, many people in the United States and other countries still like wearing a cowboy hat as their go-to headwear. Cowboys and other ranch workers regularly wear it, and it is frequently seen as a symbol of the American West.
Gather Your Materials
Gathering your supplies is one of the most crucial things you can do when sketching a cowboy hat. This calls for possessing a decent pencil and piece of paper in addition to several other useful items. When obtaining your supplies, keep the following in mind:
1. Pencils
The kind of pencil you use matters when drawing a cowboy hat. Choose a pencil that is simple to control and will result in a fine line. The ideal pencil has a very fine point. You may also want to consider using a mechanical pencil, as this can make it simpler to get a uniform line.
2. Paper
The type of paper you use is also important. You want to use smooth paper that is easy to draw on. This will help you get a nice, even line.
3. Other Tools
There are a few other items you can use in addition to a pencil and paper while designing a cowboy hat. You can draw straight lines using a ruler, and you can fix any errors with an eraser. To draw accurate circles, you might also wish to use a compass.
4. Reference Images
Finally, it can be helpful to have some reference images on hand. This can help you get the proportions of the cowboy hat right. You can find reference images online or in magazines.
By gathering all of these materials, you’ll be ready to start drawing your cowboy hat.
Choose Your Reference Picture
There are a few considerations you should make when selecting a reference image for your cowboy hat drawing. To start with, make sure the reference image is of a high caliber. This implies that it must be uncluttered and clear of all outside distractions. Second, select a reference image that depicts the hat from all sides. In this manner, you may see the hat from all angles and get a good notion of how it seems. Last but not least, you want to confirm that the reference image features a cowboy hat you like. You can be certain that the drawing’s outcomes will satisfy you in this way.
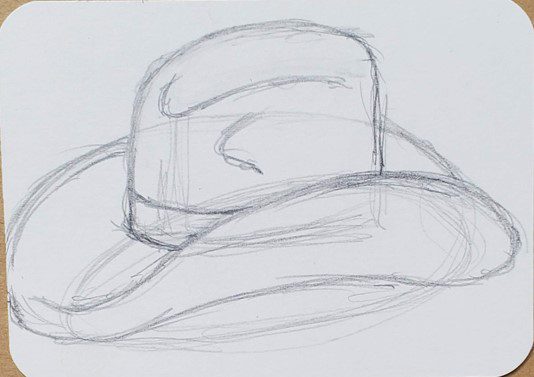
Draw the Crown of the Cowboy Hat
When it comes to cowboy hats, there are many different ways to draw the crown. In this blog post, we’ll show you one way to draw the crown of a cowboy hat. This method is simple and easy to follow, so anyone can do it!

Start by sketching a rectangle first. This will serve as the cowboy hat’s foundation. Make two triangles next, one on each side of the rectangle. These will be the cowboy hat’s sides. A curved line should then be drawn over the top of the rectangle. This will be the cowboy hat’s brim.
It’s time to add some features now that you have the cowboy hat’s basic shape. Start by drawing a line down the center of the rectangle. The cowboy hat’s seam will be here. Next, trace a line over the hat’s brim. The hatband will be this. To depict the stitching, put some lines inside the triangles.
Now that you have the basic design and elements of the cowboy hat, it’s time to add some colour. Choose a light brown colour for the cowboy hat’s body. Choose a dark brown colour for the brim. Choose a black hue for the hatband as well.
I’m done now! You now know how to draw the crown of a cowboy hat. Don’t forget to practise frequently if you want to become an expert at sketching cowboy hats!
Draw the Brim of the Cowboy Hat
Wide-brimmed hats are known as “cowboy hats,” and they are frequently worn by cowboys and other persons who perform outside work. It usually has a large brim made of felt or straw to shield the user from the sun and rain.
There are a few considerations to make while sketching the brim of a cowboy hat. Initially, the wearer should be shielded from the sun and rain by a wide enough brim. Second, the brim ought to be slightly curled to avoid resting flat against the head. Finally, to avoid obstructing the wearer’s eyesight, the front of the brim should be slightly raised.
With these things in mind, let’s take a look at how to draw the brim of a cowboy hat.
Start by drawing a curving line that descends to the eyebrow from the back of the head. The following are the results of the survey. After that, draw a second curving line that descends from the eyebrow to the nose. This will be the brim’s front.
Next, create a third curving line that descends from the nose to the chin. This will be the brim’s base. A fourth curving line that begins at the chin and rises back up to the back of the head should then be drawn. This will be the brim’s peak.
After creating the brim’s basic outline, you may begin to add more details. Make a line down the middle of the brim first. This will lend some structure to the brim. The brim should then have a few lines drawn over it to simulate stitching.
Last but not least, apply some creases and wrinkling to the brim to give it some character. That’s all, then! You now understand how to draw a cowboy hat’s brim.
Adding the Curve to the Brim
A brim that curls up at the sides is necessary for a cowboy hat to be complete. This is how the hat gets its recognisable shape. Also shielding from the sun and wind, the brim. Start by drawing a straight line across the bottom of the brim before adding the curve. Next, join the ends of the straight line with a curved line. In order to avoid significantly altering the contour of the brim, the curve should be mild.
Sketching the Hats Details
There are numerous small nuances that go into making cowboy hats appear just perfect. And it’s crucial to get all of those aspects correct when you’re drawing a cowboy hat.
Starting with the hat’s fundamental shape is the first thing you should accomplish. This hat often has a lofty crown and a wide brim. You may begin to add the details once you have the fundamental shape established.
The cowboy hat often has a wide brim. Moreover, the sides are typically somewhat arched. This is how the cowboy hat gets its recognisable form.
Another crucial component of the cowboy hat is the crown. It is often quite tall and frequently embellished with a leather or cloth band. This band typically has a pattern or design on it.
You can begin to apply shade once you have the cowboy hat’s basic design and details down. This will give the hat a 3D appearance. To begin shading, use a light pencil to lay the foundation. The shadows can then be added using a pencil that is darker.
When you’re shading the cowboy hat, it’s important to remember that the brim of the hat is usually quite dark. This is because it’s often made of leather. The crown of the hat is usually lighter, because it’s often made of fabric.
Once you have the basic shape and shading of the cowboy hat down, you can start to add in the details. This is where you can really make the hat your own.
You can add a pattern to the brim of the hat, or you can add a design to the band around the crown. You can even add a logo to the front of the hat.
There are endless possibilities when it comes to the details of a cowboy hat. So, take your time and experiment until you find the perfect combination for your sketch.
Refining the Drawing
There are a few factors that you should keep in mind when drawing a cowboy hat. Then, check to see if the hat’s brim is sufficiently wide. Because it will keep the sun out of your eyes, this is crucial. Moreover, you’ll want to confirm if the hat is tall enough. You don’t want the hat’s brim to be too near to your head, thus this is crucial. Next, you will want to make sure that the hat is the proper size for your head. You do not want the hat to be too loose or too tight, therefore this is crucial.
Erasing Unnecessary Lines
Learning how to edit your work is one of the most crucial skills you can develop as an artist. Particularly when it comes to painting, this is true. When we first start out, we frequently have a tendency to add excessive details to our drawings. They may appear congested as a result, which may make it challenging for the viewer to concentrate on the main issue.
Learning how to remove pointless lines is one technique to solve this issue. It will take some practise to become proficient in this ability, but it will be well worth the effort. Editing your drawings will enable you to produce neat, fashionable artwork that is sure to turn heads.
So, how do you go about erasing unnecessary lines? Here are a few tips to get you started:
1. Use an eraser that is specifically designed for drawing. These erasers are usually softer and more delicate than standard erasers, which makes them ideal for removing unwanted lines.
2. When erasing, take your time and be careful not to damage the paper. Work slowly and gently until you’ve removed the unwanted line.
3. Use a light touch. The more pressure you apply, the more likely you are to damage the paper.
4. If you make a mistake, don’t worry. Just grab a new piece of paper and start again.
With a little practice, you’ll be able to erase unwanted lines like a pro. So, get out your pencils and erasers and give it a try!
Adding Texture and Details
Adding texture and details to your cowboy hat drawing can really bring it to life! Here are some tips to help you out:
1. To add texture to the brim of your hat, try using a fine-tipped marker or pencil to draw in some small, wavy lines.
2. For the body of the hat, you could add some stitching details by drawing small lines that curve in and out.
3. To give your cowboy hat a realistic look, don’t forget to add the band! Use a dark-colored pencil or marker to draw a thin line around the edge of the hat.
4. Finally, add some shading to really make your drawing pop. Use a light-colored pencil or marker to add some soft shading around the brim and body of the hat. Then, use a dark-colored pencil or marker to add some deeper shading in the creases and folds of the hat.
Drawing the Hat Band
Wide-brimmed hats are known as “cowboy hats,” and they are frequently worn by cowboys and other people who operate in the American West. The hat often has a wide brim and is constructed of felt or straw to assist shield the wearer from the sun. Moreover, the hat features a band around the crown that is frequently embellished with a silver concho or another ornament.
It’s crucial to get the hat’s proportions right when you’re creating a cowboy hat. Almost twice as wide as the hat’s crown should separate the brim from the crown. A half-inch broad border should surround the crown. To assist you in getting the proportions correct, use a ruler or a piece of string.
After drawing the hat’s basic shape, you may begin to add features. The hat’s brim can be either straight or curled. The ring that encircles the crown can be either plain or embellished with an accessory like a concho. You can also add a feather or other adornment to the hat.
When you are finished drawing the hat, you can color it in or leave it black and white. You can also add shading to give the hat a three-dimensional look.
Drawing the Hats Inner Lining
When it comes to cowboy hat drawing, one of the most crucial elements is the inner lining. Without it, the cowboy hat would just be a floppy mess because it gives the hat structure and strength. The inner lining of a cowboy hat can be drawn in a few various ways, and in this post we’ll look at some of the most common ones.
Using a single, uninterrupted line is one of the easiest ways to sketch the interior of a cowboy hat. This process is quick and simple and results in a tidy, polished appearance. Just trace the outline of the cowboy hat, beginning at the brim and moving towards the crown, to create the inner lining. To later attach the hatband, be sure to leave a little space at the top of the crown.
Two lines, one for the brim and one for the crown, are another widely used technique for designing the interior of a cowboy hat. This procedure is a bit more time-consuming than the first, but it gives a more realistic-looking finish. Using this technique, trace the brim’s outline to begin drawing the inner lining. A tiny hole for the hatband should be left at the top of the second line you draw around the crown.
Finally, you can also use a sequence of tiny, interconnected circles to represent the interior of a cowboy hat. This approach is very quick and simple, making it ideal for novices. Starting in the centre of the brim, draw a little circle to represent the inner lining. Then, start at the brim and work your way up to the crown by drawing a succession of smaller circles. To later attach the hatband, be sure to leave a little space at the top of the crown.
Drawing the interior of a cowboy hat is a straightforward work that anyone can complete, regardless of the approach they use. So grab a pen and some paper and give it a shot!
Creating Shadows
This lesson will teach you how to add shadows to a sketch of a cowboy hat. Starting with a simple hat form, we’ll later add a few easy features to give it some depth. To make it appear as though the hat is positioned in front of a light source on a table, we’ll add some shadows last.
Creating the Hat Shape
We’ll start by creating a basic hat shape. For this, we’ll use a simple oval. First, draw a small oval for the top of the hat. Then, draw a larger oval around it for the brim of the hat. Make sure to leave a small gap between the two ovals.
Adding Details
Now, let’s add some details to the hat. First, draw a line down the center of the top oval. This will help give the hat some dimension. Next, draw a few lines around the brim of the hat to indicate the stitches that hold it together. Finally, add a small circle at the front of the brim for the hatband.
Creating Shadows
Let’s now give the cap some shadows. Make a shadow first under the hat’s brim. This will give the impression that the table is being shadowed by the brim of the hat. Next, make a shadow on the hat’s top. The hat will appear to be illuminated from above as a result of this. Add a few shadows to the hatband’s perimeter last. The hatband will appear to be sitting on a table and gain some depth as a result.
That’s all, then! You now understand how to design shadows on a cowboy hat. To make drawings of other items more realistic, practice this approach on them.
Read Also:
Conclusion: Cowboy Hat Drawing
In conclusion, Drawing a cowboy hat can be exciting and difficult, but with the correct equipment and methods, anyone can produce an accurate picture with lots of detail. You may learn how to sketch the basic shape of the cowboy hat, add texture and details, and polish the drawing to make it look polished and professional by following the step-by-step instructions offered in this article. Whether you’re a seasoned artist or a novice, honing your cowboy hat drawing techniques will help you advance your drawing abilities generally and create your own distinctive drawing style. Thus, don’t be reluctant to pick up some pencils and give them a go.